Add/Edit Items and Media
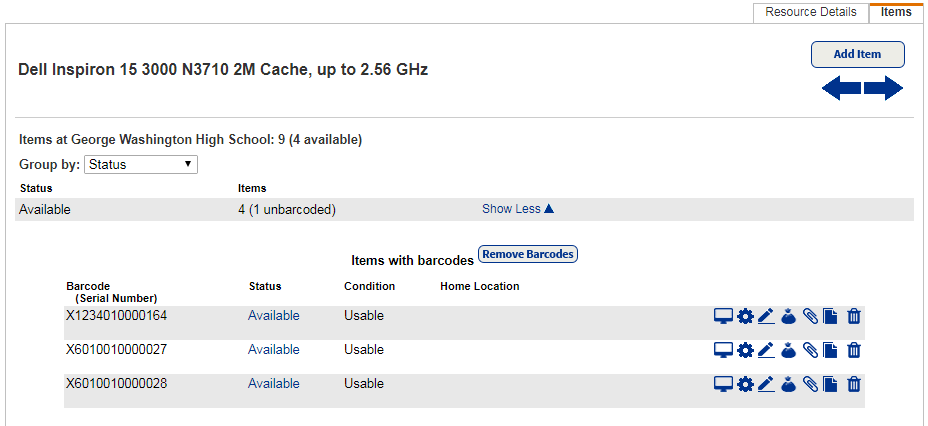
Resource item and media records identify your physical items and include information about a specific resource, such as serial number, barcode and brand.
You can add items with or without barcodes or redemption codes as needed.
Add Items or Media
As you complete the fields, keep in mind the information you want to gather on reports.
- Search for a resource.
- From the search results, click Details next to the correct description record.
Note: When searching by barcode, whether from the district or across the district from a site, it is possible that search results will contain duplicate barcodes. Ensure you select the resource you want. Duplicate barcodes could be found at sites other than your own. If so, you can choose to transfer the appropriate resource. - From the Resource Details, Items or Media sub-tab, click Add Item for hardware, textbooks or digital, or Add Media if the resource is software.
- If you are a district-level user, select the Site Type and Site Name from the drop-downs.
- From the Number of Items drop-down, select the appropriate option:
- Number of Items: Select and enter how many items you want to add. You can add up to 99,999 items.
- Unlimited: Once a number of items is added to the resource, this option disappears. You cannot have both Number of Items and Unlimited for a single resource.
- List of Barcodes: To create a list of barcodes, click Add. Place the cursor in the
List of Barcodes
field, scan a barcode, and then click Add. When you are done scanning, click Save. - From Barcode File: Click Browse (or Choose File, depending on your browser). Find and select a barcode file, and then click Open.
- List of Redemption Codes: To create a list, click Add. Place the cursor in the List of Redemption Codes field, type a code, and then click Add. When you are done adding codes, click Save.
- From Redemption Code List File or From Redemption Code XML File: Click Browse (or Choose File, depending on your browser). Find and select your file, and then click Open.
- If you are adding items with barcodes, type the first barcode, or assign the next available barcode in the Starting Barcode field.
- Use the table to complete the fields as needed.
Note: Fields vary based on the type of item being added. Reports and inventory are more accurate when you complete more fields. Field Name Description Status
The item's availability for circulation. Condition Set the item's condition in regards to appearance. Home Location The physical room where the items are located. Budget Category Choose from a list of budget categories. Date Acquired By default, it is set to the current date. Purchase Price Include the price if you want the information to show on overdue or lost items. Purchase Order Include the purchase order number used for the items. Custodian Individual accountable for an item. The custodian remains accountable for that resource until the item is checked out. Department Department or department head responsible for the items. Funding Source Indicate that the items were purchased using a particular funding source. District Identifier Unique tag used to identify individual pieces of equipment. Serial Number Include the item's unique serial number. Salvage Value Indicate how much an item is worth after it has reached its expected life. This value is used to calculate annual depreciation and is a column in the Resource Value report. Projected Life Estimated number of years an item is expected to be in use. Item Categories Group items for different purposes, such as tracking vendors and funding sources, and collecting items for stocking classrooms or labs. Notes Include information unique to a copy, such as damage to the book or a signed copy. The note shows at the top of the page whenever you first retrieve a copy in Circulation.
- To print barcode labels after adding the items to your catalog, select the Print labels checkbox.
- Click Save.
Duplicate an Item Record
When you acquire new items, you can duplicate an item record you already added instead of starting from scratch. For example, if you buy five laptops of the same make and model as the ones purchased last year, you can modify an existing item record to save time.
- From the search results, click Details next to the correct resource.
- Click the Items sub-tab.
- Next to the item record you want to duplicate, click
 .
. - Enter the details of your new item.
- To print barcode labels after adding the items to your catalog, select the Print labels checkbox.
- Click Save.
“On Order” Items
Your district and school can track resources you have ordered from an outside vendor. Use the Status drop-down to assign On Order to an item, which lets you track the items, receive them and send them where they are needed.
To monitor your On Order
items, see On order items.
For more information on managing resources, see Details tab, Items tab / Media tab, Licenses tab and Supplements (Resource Manager).