Collect Inventory Data with Follett Remote
Follett Remote lets you collect copy or item barcode numbers for inventory tracking purposes when you are not connected to the network. You can use Follett Remote to collect barcode numbers right at the shelf, and upload them into Destiny later.
To collect barcode numbers for an inventory using Follett Remote:
- Launch Follett Remote (on your Follett hardware device or a workstation).
- From the Function menu, select your Destiny product.
Note: If you are using Resource Manager, select Asset.
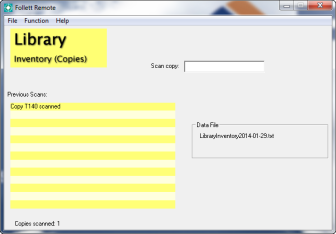
- Select Inventory (Copies) if you are using Library Manager, Textbook Manager or Media Manager, or Inventory (Items) if you are using Resource Manager.
- To account for a copy or item, scan or type its barcode number in the Scan copy field. The 13 most recent scans appear in the Previous Scans section. The total number of copies or items scanned appears at the bottom of the window.
Note: The Data File box displays the name of the file holding the scans.
To upload a Follett Remote data file into Destiny’s inventory function:
- Open Destiny.
- Select Admin > Inventory.
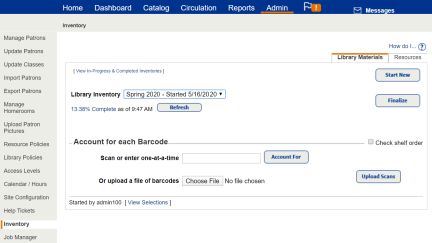
- Next to the Or upload a file of barcodes field, click Choose File (or Browse based on your browser).
- Find your file of scanned barcodes, and then click Open. The default file location is C:\Follett Remote.
- Click Upload Scans.
- Click Job Manager to view the Inventory Job Summary.